Tuesday, January 28, 2014

vanilla chiffon: a tuesdays with dorie post

for this week's challenge, the tuesdays with dorie bakers made the vanilla chiffon roll.  chiffon cakes can be a little fussy.  as with any sponge type cake, proper whipping of the egg whites is crucial.

when i am making a cake, i like to get all of the ingredients measured out so that they are ready to go as i need them.

the egg yolks are whisked with the water, oil and vanilla.  the recipe calls for 2 tablespoon of vanilla.  while i wholeheartedly suggest that you not skimp on the vanilla extract most recipes call for, go ahead this time, cut it in half!  one tablespoon is more than enough!!!

whipping the whites with the sugar until they are still a little soft and shiny is key.  under whip them and they will not have the ability to lift the cake.  over whip them and the cake will collapse.  it is always best to err on the side of under whipping-the air bubbles will still expand and will not burst during the baking which is what happens when the whites are over whipped.

the batter is light and airy but appears to be on the thick side when properly folded together.  

spread it evenly in the pan so that the height is consistent through out the cake.

my cake was attempting to escape the pan-the batter is just a little more than needed.  next time, i might try using a 12" x 18" cake pan rather than a half sheet pan.  and like all of the other bakers mentioned, the baking time is definitely wrong.  it needed at least 20 minutes in the oven rather than the 10-12 minutes the recipe calls for.

the mousse filling is a little unusual.  it calls for heating the egg yolks and then whipping them with a cooked sugar syrup.  it is whipped to a fairly stiff ribbon.  the walnuts for the filling are ground in a food processor and the oil is added to form a smooth paste.  then the melted chocolate is added to make a base for the mousse.  typical of a mousse, the eggs and chocolate get folded together, carefully, and the filling is allowed to sit in the fridge to set.

the filling is spread over the cake and it is rolled up.  a few observations and opinions;  there is too much cake and too much filling to make rolling it up easy.  if i were to do this again, i would definitely cut the two recipes back by a third-or as close to a third as i could get it.  the mousse recipe calls for walnut oil which is something i did not have and did not want to buy.  i added a little sesame oil to give it a nutty flavor.  if you chose to do this, add 2 teaspoons to a tablespoon-a little goes a long way and i added too much!

when cutting the cake, i saved the two end pieces since i was bringing the finished cake to a pot luck dinner.  candied walnuts were not an option since i only had chopped walnuts to work with but i did have some homemade caramel sauce for the plate.

the filling actually held well once cut; despite the lack of gelatin, it never collapsed or oozed out.

pink champagne was the perfect choice to accompany our slices of cake.  not...the truth, i shot these photos in the middle of the afternoon and i didn't have any pink champagne.  a bit of homemade komobucha with a little of berry juice mixed in was my stand in; it is naturally fizzy!

for those of you wanting to bake one, here is the link to the recipe.  to see how the other bakers did, check out the tuesdays with dorie page

Monday, January 27, 2014

cinnamon roll cake with crunchy almond topping


cinnamon roll cake with a crunchy almond topping


breakfast breads are some of my favorite things.  sweet, tender, yeasty, full of cinnamon and when warm from the oven, nearly impossible to resist.  swirled breads and rolls always catch my attention and if i am making a batch at home, you can be sure it will be some sort of cinnamon swirled, yeast raised bread.  lately, i have seen any number of monster sized rolls baked in a cake pan and decided to take that route.

a standard sized recipe that would normally make about a dozen rolls was rolled out into a thin rectangle that measured 24"x 10".   to make the filling, i broke out my secret recipe which is the topping for another of my favorite breakfast breads, a concha.  if you are unfamiliar with conchas, visit a hispanic bakery; they are large, fluffy sweet rolls with a crunchy cinnamon topping that has a shell pattern to it.  a buttery cinnamon mixture is spread on the dough and then the dough is cut into 2"x 24" strips.  the strips are continuously wound around each other to make a giant spiral of dough and filling.  it is placed in a 10" cake pan and allowed to rise so that it fills the pan.

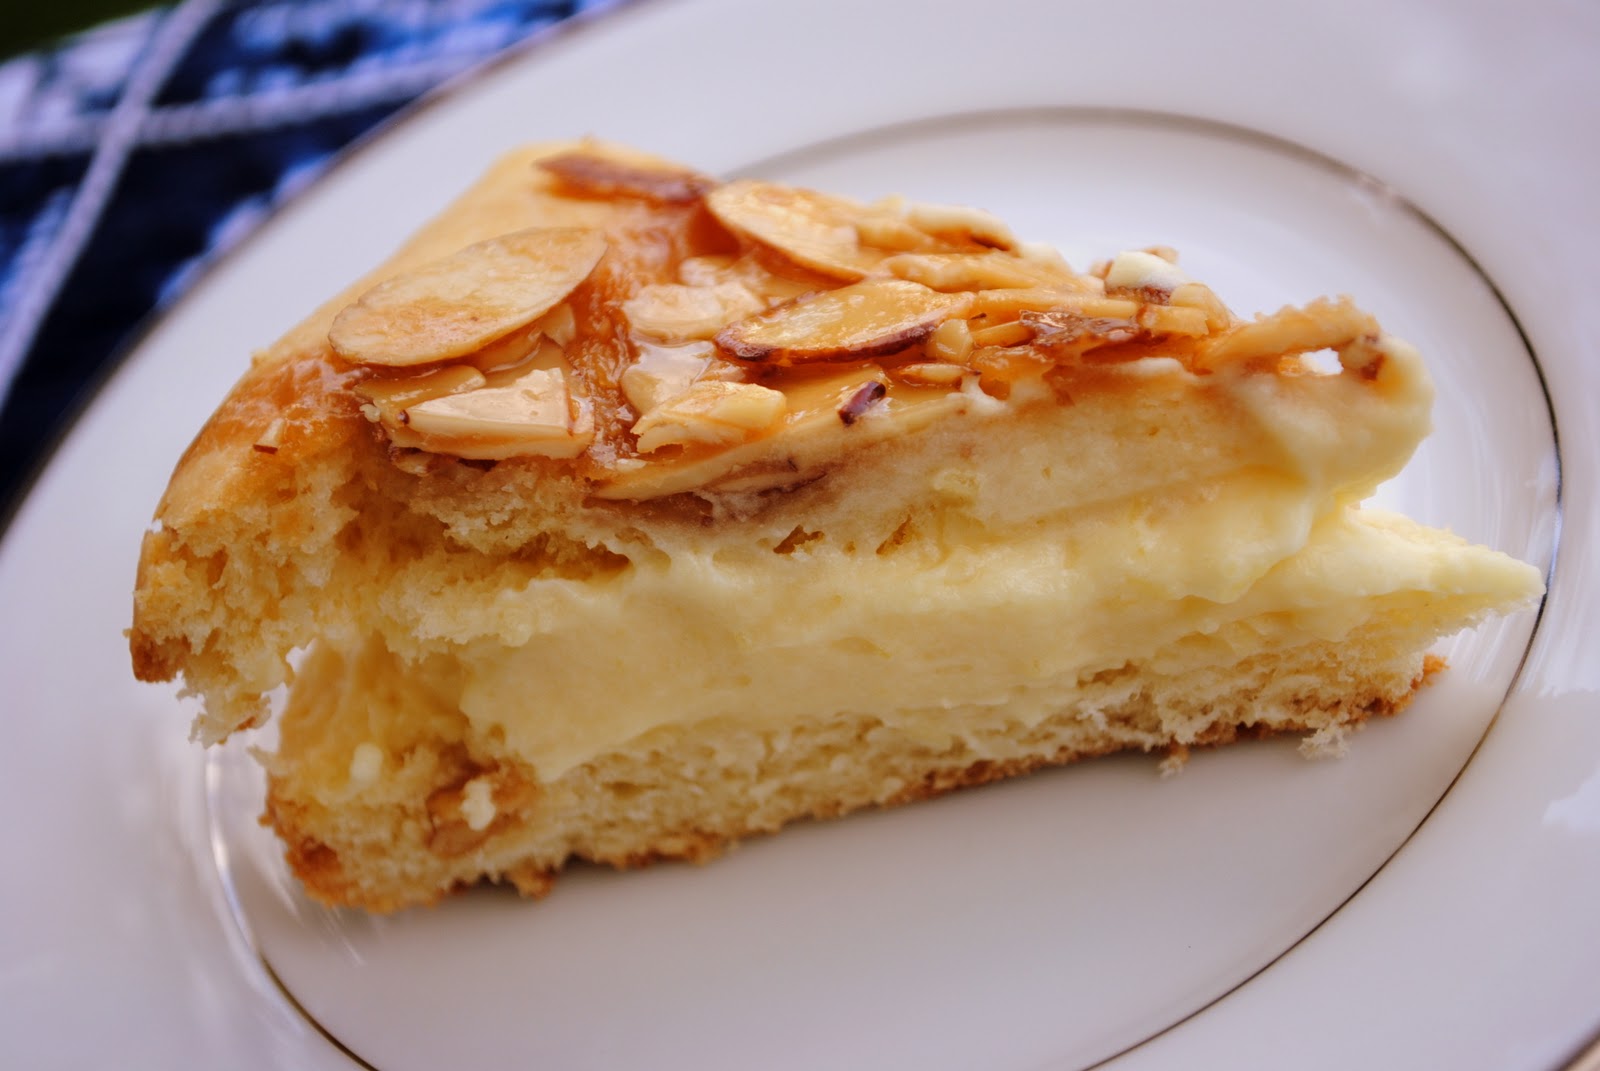
but as always, i didn't stop there.  to top off the cake, i cooked up a batch of my favorite almond topping.  there is a traditional german cake called a bienenstich, bee sting in english, which is made of layers of cake with custard filling and a crunchy almond topping.

the topping is made with butter, almonds, cream, flour, honey and brown sugar  and it is cooked until it boils.  the hot topping is spread over the completely risen cake just before baking and then the cake goes into the oven so the magic can happen.  after about an hour, the cake is ready; cool it in the pan for at least 10 minutes then carefully remove it.  one note, i never use springform pans.  the thin gauge metal allows the outside of the cake to burn before the inside is cooked and they always leak!  just use a regular 10" cake pan and when it is cool enough to handle, place a plate on the top and invert the cake.  pull off the cake pan, place another plate on the bottom of the cake and invert it again.  then prepare the drizzle and drizzle away!  this cake is best served while still warm from the oven but it reheats nicely.

makes 1 (10") cake serving at least 12

dough recipe
1 1/4 cup milk
1 package yeast (2 1/4 teaspoons)
6 tablespoons sugar
1 teaspoon salt
5 tablespoons unsalted butter, melted and cooled
1 egg, at room temperature
about 4 cups all purpose flour,
cinnamon filling, recipe follows
crunchy almond topping, recipe follows

gently heat the milk to about 100 degrees F.  add the yeast and stir it to combine.  allow the mixture to sit until the yeast starts to get foamy.  add the sugar, salt, butter, egg and about 3 cups of the flour and mix to make a soft dough.  using the dough hook with the machine on medium low, continue to add enough flour that comes together and forms a smooth that cleans the sides of the bowl.  continue to knead the dough for about 5 minutes then place it in an oil bowl to rise until doubled, about 1 1/2 hours.

while the dough rises, make the cinnamon filling and set it aside at room temperature until needed.  when the dough is ready, remove it from the bowl and place it on a large flat surface.  using a rolling pin and a small amount of flour, roll the dough out to a long rectangle measuring 10" x 24".  spread the filling evenly over the surface.  using a pizza wheel/pastry wheel, cut the dough into long strips measuring 2" x 24" each.  starting with one strip, roll the dough up into a spiral and place it in the center of a 10" heavy gauge aluminum cake pan (not a spring form pan) that has been greased and lined with parchment paper -grease the paper too.  take the remaining strips of dough and continue to wind them around the spiral to make a giant cinnamon roll.  cover the cake with plastic and allow it to rise until it fills the pan, 1-2 hours or place it in the fridge overnight, take it out and allow it to sit at room temperature for about an hour before baking.  while the cake rises, make the almond topping recipe.  just before baking, spread the topping evenly over the cake almost to the edges.  preheat the oven to 350 and bake until a pick inserted comes out clean and the internal temperature in the center is 195 degrees F.

allow the cake to cool on a rack for 10-20 minutes.  place a plate over the cake, invert it, remove the paper and cover the bottom of the cake with another plate and invert it again.  drizzle a little white glaze over the cake if desired (1 cup powdered sugar mixed with a tablespoon or two of milk to form a glaze with the consistency of honey).

cinnamon filling recipe
4 tablespoons unsalted butter, softened
1/2 cup dark brown sugar
1/4 teaspoon salt
1 teaspoon cinnamon
1 egg
1/2 cup all purpose flour
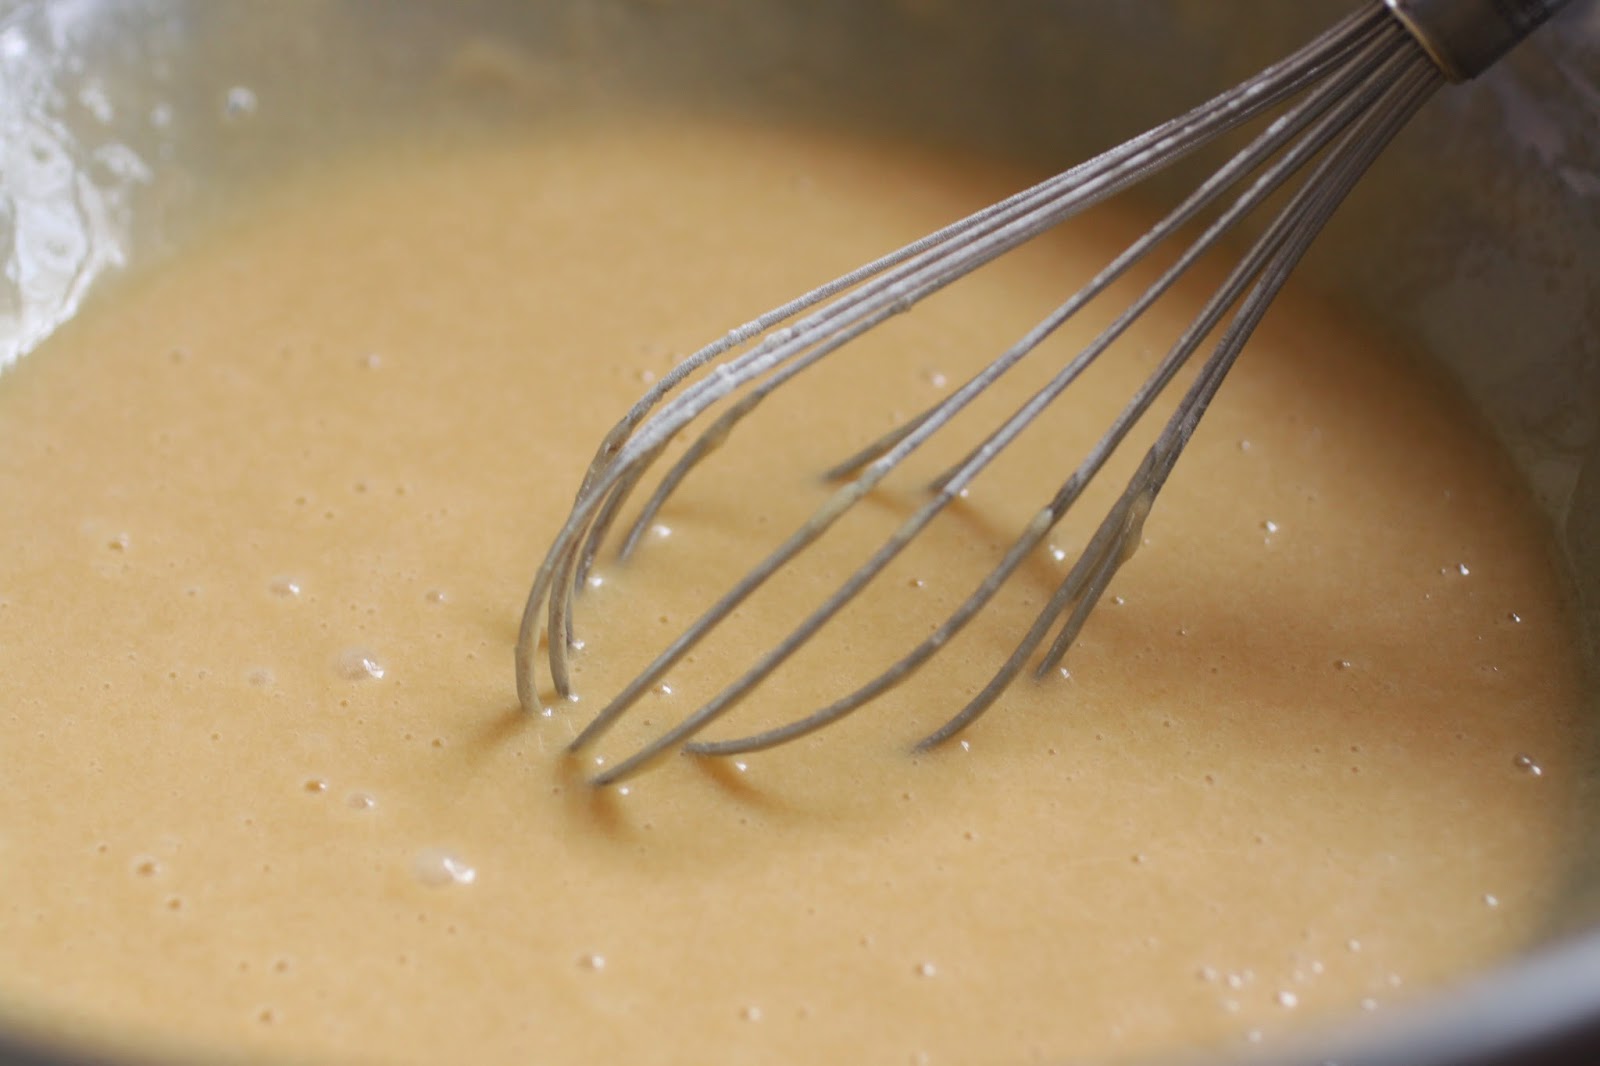
in a small mixing bowl, cream the butter with the brown sugar, salt and cinnamon until fluffy.  add the egg and mix well.  sift the flour over the mixture and combine to form a smooth, spreadable batter.  keep at room temperature until needed.

crunchy almond topping
3 tablespoons unsalted butter
3 tablespoons light brown sugar
2 tablespoons wildflower honey, or other light honey
1 tablespoon half and half
3/4 cups sliced almonds
place the butter, brown sugar, honey and half and half into a saute pan.  heat over low heat until the butter melts.  turn the heat up to medium and bring to a gentle boil.  allow the mixture to boil for about 2 minutes, stir in the almonds and remove from the heat.  spread the topping over the cake so that it covers the top but leave a half inch border around the edge to prevent it from running down the sides of the cake and causes sticking.


Thursday, January 23, 2014

old fashioned iced oatmeal cookies

my latest baking obsession, iced oatmeal cookies.  no, i cannot explain it.  of course, i have always liked oatmeal cookies, especially oatmeal cookies with dried currants in them.  and yes, i have always preferred them to be homemade and warm from the oven.  even so, i really like the ones that come in a bag with the hard white frosting.  crispy cookie and crunchy white frosting.  go figure.

unfortunately, when your doctor has told you that your cholesterol level is higher than what is considered normal, you cannot indulge in cookies loaded with butter.  therefore, i made an attempt to slim this favorite snack down and make it a little better on the numbers.

my starting point for the cookies was this recipe from mel's kitchen cafe.  to change the recipe, i substituted whole wheat flour for the all purpose flour and virgin coconut oil for the butter.  each was a 1 for 1 swap meaning that an identical amount of the substitute was used for the original ingredient.

coconut oil and whole wheat flour make a drier batch of dough.  i gently pressed each of the cookies down to form a thick disk before i put the pan in the oven.  the results were a cookie that was dense and not as crispy as butter would have made them.

the glaze was simply powdered sugar with a little milk in it.  each cookie was dipped in the glaze and placed on a rack to drip and set.  they did not set quickly and that moisture softened the cookies a bit.  not necessarily a bad thing but it did not give them the crispy/crunchy texture i was hoping for.

pretty but not perfect.  tasty but not the taste i wanted.

 i soldiered on.  for the second batch, i pulled out my own recipe and baked off a batch.  this time, i also substituted coconut oil and whole wheat flour but i tinkered with some of the amounts.  then to frost them, i went with my instincts and whipped up a small batch of royal icing and thinned it out with water to make a drippy glaze.  these look a whole lot more like what i was hoping for and they also taste a lot more like what i was hoping for.

for comparison, batch #1 on the left, batch #2 on the right.  will i make these again?  you betcha!

old fashioned iced oatmeal cookies
makes about 24 small cookies

1 1/2 cup rolled oats
1 cup whole wheat flour
1 teaspoon salt

1 teaspoon baking soda
4 ounces coconut oil
1 cup light brown sugar
1 1/2 tablespoon molasses
1/2 teaspoon salt
1 egg
1 tablespoon water
1/3 cup dried currants

preheat the oven to 350.  in a bowl, combine the oats, whole wheat flour, salt and baking soda and whisk it to combine, set aside.  in a mixing bowl, combine the coconut oil, brown sugar, molasses and salt and mix at medium-low speed until fluffy.  add the egg and water and mix until combined.  pour the combined dry ingredients in and mix on low speed until it starts to come together.  add the currants and mix until combined. scoop out the cookies using a small (#40 or #50 if you can find one) portion scoop and place them on paper lined sheet pans.  bake until lightly golden and a little puffy, about 10-12 minutes.  cool completely before glazing.

royal icing glaze
1 egg white
2 cups powdered sugar
combine the ingredients and whip on medium-high speed until it forms stiff peaks.  add water, a teaspoon at a time to make a slightly runny(but not watery!) glaze.  dip the tops of the cookies in the glaze taking care not to dunk them in completely, they should have spots of cookie showing, refer to the photo.   place each dipped cookie on a rack to set and harden.  store airtight.

Monday, January 20, 2014

afghan home-style naan

not many people realize that our neighborhood has one of the largest kurdish populations in the country.  as a result, many of the shops cater to our kurdish neighbors.  it was in one of these shops that we experienced authentic naan for the first time.  the owner of the shop was so friendly and welcoming that he actually allowed me to go to the back of the shop and watch the ladies shape and bake the bread in a tandoor oven.

we may not have a tandoor oven in our kitchen, but that hasn't stopped me from making naan at home.  it is such a simple, quick to mix bread dough that it can easily be on the table in couple hours.  the recipe i used was adapted from the classic book, flatbreads and flavors by jeffrey alford and naomi duguid.

the bread is rolled out on a sprinkling of sesame seeds so that they become embedded in the dough.  the dough gets slashed in a star pattern to prevent bubbles from forming.  then it goes into the oven and bakes up very quickly on a hot stone or quarry tiles.

the recipe calls for all whole wheat flour but i used substituted 1 cup of bread flour because i ran short on whole wheat.  even so, the bread is still chock full of whole grain goodness!

the loaves baked up very quickly on the stone in about ten minutes. 

typical of a freshly baked naan, it is spongy and chewy.  the sesame seeds give it a nice crunch and a nutty flavor.


afghan home-style naan
makes 6 loaves

2 teaspoons dry yeast
1/2 cup warm water (105-115F)
1 cup cold plain, whole milk yogurt
1 cup boiling water
approximately 5 1/2 cups whole wheat flour
2 tablespoons safflower or corn oil (i used olive oil)
2 teaspoons salt
6 tablespoons sesame seeds

sprinkle the yeast over the 1/2 cup of warm water in a large bowl and stir it to dissolve it.  place the yogurt in a small bowl and stir in the boiling water.  whisk it to combine and allow it to cool to 105-115F.  stir the yogurt mixture into the yeast .  

to make the sponge, stir 3 cups of flour into the yeast mixture.  stir it in one direction for 2 minutes. cover with plastic and let stand for 30 minutes.

sprinkle the oil and salt over the dough and begin adding the flour, 1/2 cup at a time to form a soft dough.  you can do this by hand or in a mixer with the dough hook.  i used the mixer.  knead the dough until it is smooth and elastic and cleans the sides of the bowl (for mixer users) and for the hand kneaders, the dough should not be sticky-this will take about 10 minutes.  place the dough in an oiled bowl to rise until doubled, about 1 hour.

place a stone or quarry tiles in the oven and heat it to 450F.  punch the dough down and divide it into 6 equal pieces.  shape each piece into a 4-5 inch disk with a little flour to prevent sticking.  cover with a towel and allow it to rest for 10 minutes.  using the least amount of flour possible, roll the dough out until it starts to stretch.  brush off the flour and sprinkle about 1 tablespoon sesame seeds onto the work surface.  put the dough on top of the seeds and begin rolling it out to a rectangle that is 6"x10".  turn the dough over.  using a razor or a knife, cut 5 (1") slashes in a star pattern into the dough-i used a pizza wheel.  place the dough on a well floured peel and slide it onto the heated stone.  bake until it begins to show some golden brown on the top-don't let it get to dark or the bread will be crispy rather than spongy.  place the hot bread on a rack to cool.  repeat the steps with the other 5 rounds of dough.

Friday, January 17, 2014

red velvet cake; a true southern classic

in the past, our family birthday tradition was an ice cream cake, a store bought ice cream cake.  not a very exciting tradition but our girls loved it.  as the girls have grown up, they have moved on to other types of cake.  blame me for that.  several years ago, i insisted that they make me a birthday cake, from scratch, no mixes allowed and definitely no ice cream!  it just seemed to me that if the cake was made by my family, it would be better and have more sentiment than anything that could be purchased.  and it did; it was one of the best birthday cakes i could have had.   the girls caught on to this quickly and let me know exactly what cake they would like me to make.  my husband still prefers the ice cream cake...

our younger daughter, devon, is coming up on her 21rst birthday.  while she was home for the holidays, i told her i would make her a cake-even though it was early since i wouldn't be able to make her one on her birthday.  she quickly chose a red velvet cake slathered in cream cheese frosting, it is her favorite.

 if you follow food trends, you are most likely aware of the over abundance of red velvet.  from cookies to pancakes and cheesecakes, everything including hot chocolate mix seems to have been repackaged as red velvet.  yeah, it needs to stop.  a recent column by sean timberlake on blogher.com listed the reason why, the various concoctions just do not taste all that good and neither do most versions of the classic layer cake.  well sean, i invite you to try a slice of the cake made from my recipe because like you, i did not care for red velvet cake either until i needed to come up with a recipe for the cafe.

so what's not to like about red velvet cake?  for starters, almost every recipe you read will call for either shortening or vegetable oil and neither offers any flavor to the cake.  then for some strange reason, the recipes all ask for cocoa powder in amounts so ridiculously small that it seems like a waste of time to include it.  honestly, what can a tablespoon or (possibly but not necessarily) two tablespoons of cocoa powder do for a cake?  and finally, that bottle of red food color that must be included to call it red velvet cake.  it isn't hard to see why i might not get excited over this southern classic.

so how does one make this concoction tasty?  butter for starters because it really does add flavor.  since i did not want the red color to be the only other flavor, i upped the ante on the cocoa.  my recipe calls for 1/3 cup and it makes a big difference  in the flavor and the color.  but it doesn't stop there, the recipe also uses dark brown sugar, vanilla extract and buttermilk for a tender as well as tasty cake that is definitely birthday worthy!

all dressed up in a generous amount of cream cheese frosting.  don't you love the vintage fenton cake plate?  we received it as a gift from my mother in law and this was the first cake i put on it.

 i love the red color that the combination of dark brown sugar and cocoa powder give the cake.

it did not last long in our house!  to see the recipe, follow this link to the cafe's website.  so, if you make one, raise a fork to the diva!

Tuesday, January 14, 2014

country bread; a tuesdays with dorie post


zero...the thermometer said zero.  by nashville standards, that is beyond cold.  staying warm in that kind of cold is a challenge.  there is only so much clothing one person can wear.  the thermostat can only go so high before you run up a tremendous bill.  it is also a perfect excuse to turn on the oven and bake a batch of bread.

this week, the tuesday with dorie bakers mixed up a batch of country bread.  this simple loaf is a perfect addition to a pot of hot soup.

the recipe uses a sponge that sits for a few hours but i let mine sit overnight.  the kitchen was pretty cool due to the cold weather.  that extra time allowed the bread to develop more flavor.  the recipe also called for using a bread basket-a banneton.  amazingly, i do not own one!  instead, i use this little basket.  the pattern it makes on the loaf is eye catching.


and yes it is just another of my thrift store finds.

the loaf gets folded and shaped and folded and shaped and folded and shaped again.  i cut 4 slits across the top-it seemed like a good idea.  here it is on the peel, ready to go in the oven.

and the slits are something i probably need to work on...the ends of the loaf sort of popped out.  this recipe makes a huge loaf of bread!  i could have easily made a half batch and had plenty for the two of us.  the soft, moist bread also kept well for several days and made wonderful toast too!


the pattern that the basket makes in the crust with the flour.


the crumb is nicely textured with a little chewiness from the whole wheat and rye flour used in the recipe.  to see the recipe, visit the site of a fellow tuesdays with dorie blogger, one clever mom, who has posted the recipe.  to see the posts of the other bakers, visit the tuesdays with dorie website.

Monday, January 6, 2014

caramel apple cake

the weather is a little crazy.  yesterday it was in the 50's in the morning and by early evening, it was raining, sleeting and snowing all at once.  it changed over to snow, we got our annual dusting and the temperature dropped like a rock!  it is 9 degrees outside right now...

before all of this crazy weather started, a few of my fellow master gardeners gathered to begin planning our big urban gardening festival.  a caramel apple cake seemed like the perfect choice for a meeting.

a quickly mixed and spicy cake that is chock full of chunky apples and pecans.  it is one of my favorite cakes to bake and share with friends; it makes regular appearances at meetings and in the garden.

the recipe has been posted before and this is a link to it.  for this one, i used pecans rather than walnuts and that bag of arkansas black apples in my fridge came in handy; i used two of them since they were so large.  for the caramel drizzle, use 1 cup of your favorite caramel sauce-preferably homemade.

to decorate the cake, allow the cake to cool about 15 minutes in the pan.  invert the cake onto a rack and place the rack over a sheet pan to catch the drips.  using a spoon, carefully drizzle half of the caramel over the warm cake.  let the cake cool completely then drizzle the remaining caramel over the cake.  if a lot runs off and collects in the pan, scoop it up and drizzle it again.  the cooler the cake and the caramel, the less likely it is to run off.  just make sure it is pourable or it will form thick globs on the cake-not very attractive, trust me on this.

arkansas black apples get their name from the deep red color of the skin.  it is such a dark red that it will almost look black at a quick glance.  the flavor is a bit floral in comparison to other apples and it they are wonderful for pies and sauce and just as tasty sliced up and eaten raw.  it is a true southern apple and we have a small tree in our yard and maybe this year we will get a few before the squirrels eat them all.

Sunday, January 5, 2014

holiday cookie round up: homemade oreos

minty oreos just scream christmas!  to make these, i used my chocolate wafer recipe which you can find by clicking on this link.

for fun, i pressed each cookie with a cookie stamp so that they would be a little fancier.  to fill them, i used this recipe from wayne harley brachman's book retro desserts.  since i did not use that chocolate wafer recipe, i cannot comment on it but the filling recipe worked out very nicely and was pretty close to the real thing.  one thing to keep in mind, the moisture content in butter will cause the cookies to soften a bit after a couple days.  this did not bother me but for those of you expecting a really crispy cookie sandwich, they are best filled the day you will serve them.

to make the pattern on the cookies, i pulled this set of glass cookie stamps out of the drawer.  they were given to me more than 20 years ago and were purchased in williams sonoma.  they no longer sell this set but if you do an internet search, they will come up on various sites as "vintage" and are not terribly expensive.